07 March 2012

Kimber Tactical Entry II: The Slide

I had a bit of hesitation on doing this custom work because of my experience building the Custom Covert II. Before I worked on this gun, I built two other pistols (they're not 1911s) just to take away my mind off the Covert. It helped doing just that. After the Covert, the next two custom builds I did were very easy. I'm not telling yet which model of pistol I worked on -- I'm not a fan of them then...but I am now!

So after those two other builds, I felt I got my confidence, momentum and groove running again so I decided to sit down and get back to action with the Tactical Entry build.

Being a 1911, and basically using the same brand/kind of kit -- only a different design/model -- the process is just the same  as what I did in the Custom Covert II. But this time I'll try to make it simpler and less detailed.

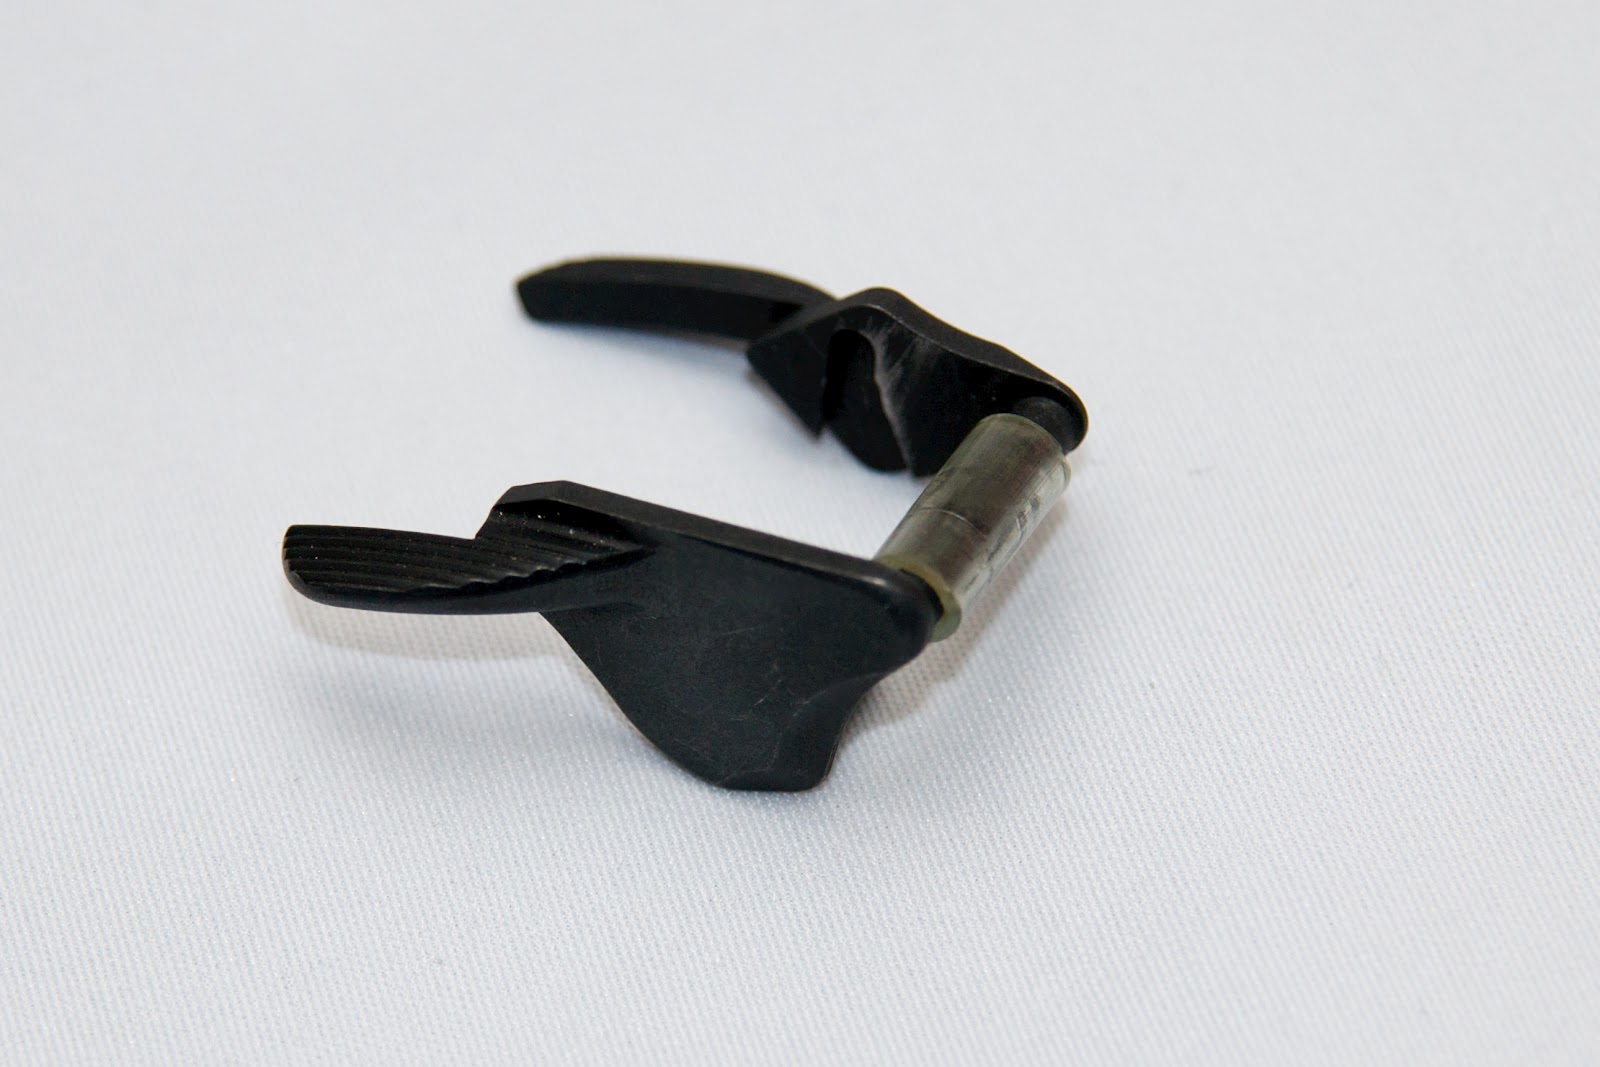
To sart off, the gun is stripped by removing the slide stop lever and the slide is taken out from the front.


The barrel plug, recoil spring and the spring guide rod was removed from the slide assembly. These were put in a pouch, labeled, and put away in the storage box.


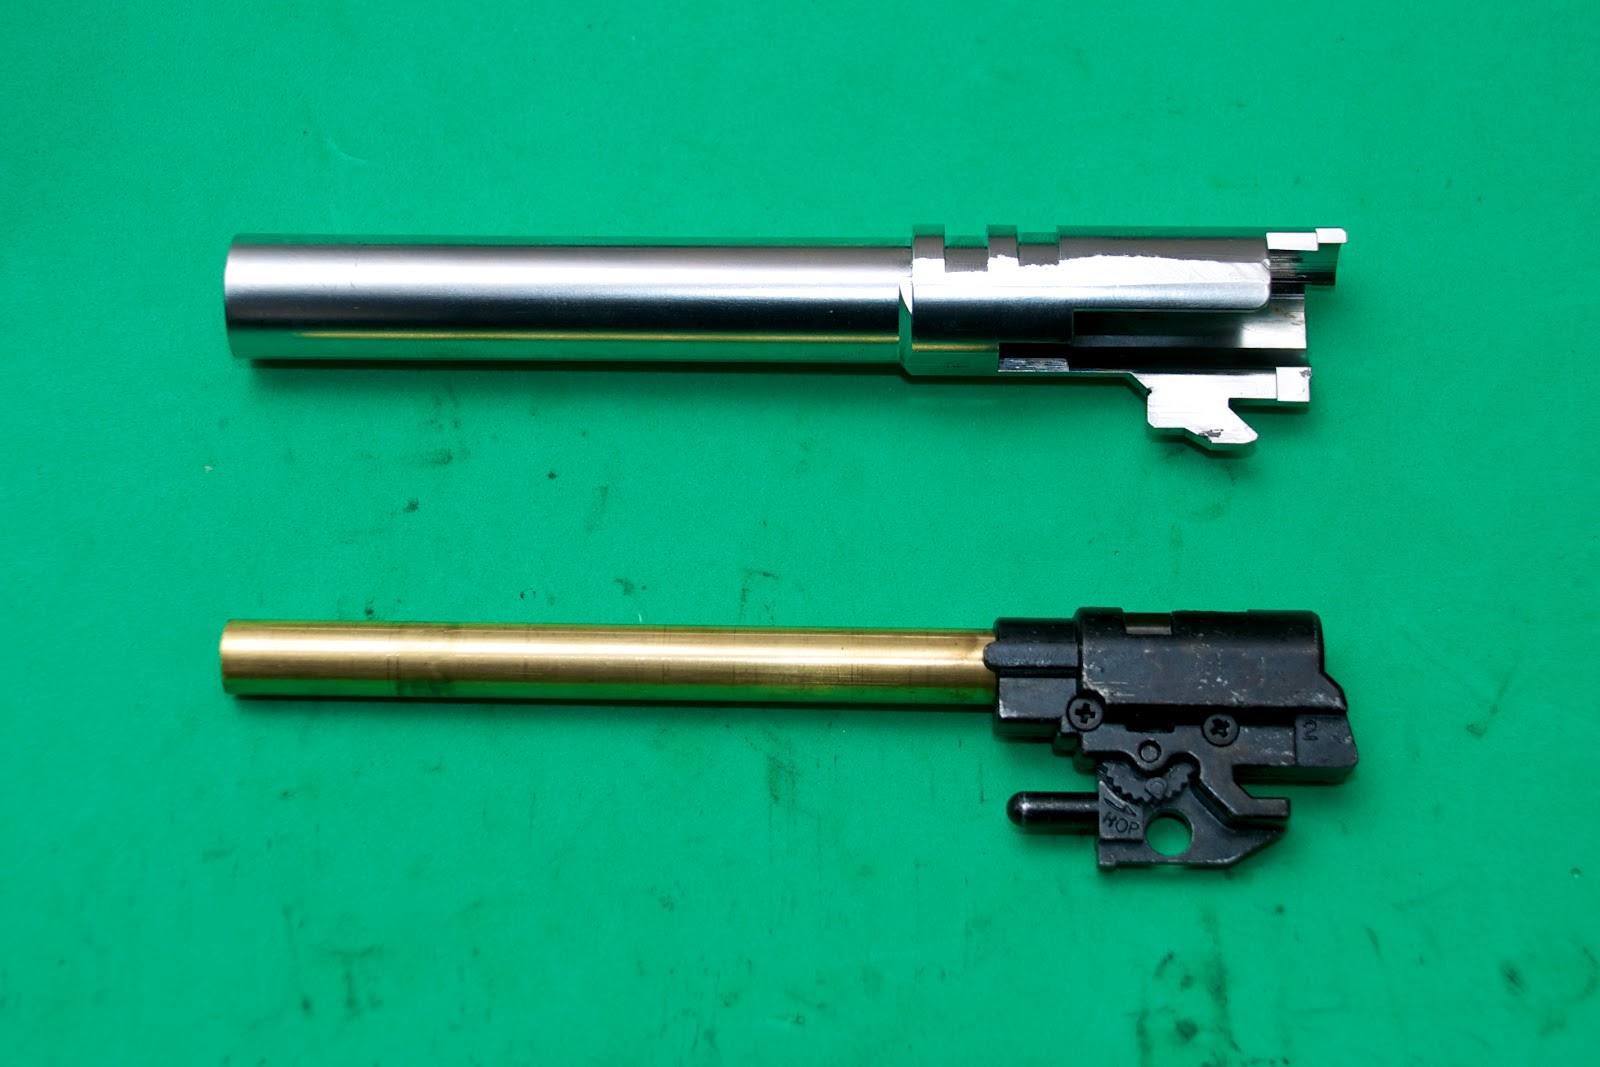
The barrel bushing and the outer barrel assembly was then taken out of the slide. Notice that the barrel bushing is the 1911A1 bushing and not the original Night Warrior silver barrel bushing. I replaced it to get the exact look of the Tactical Entry II.


The hop chamber-inner barrel assembly was pulled out of the outer barrel.


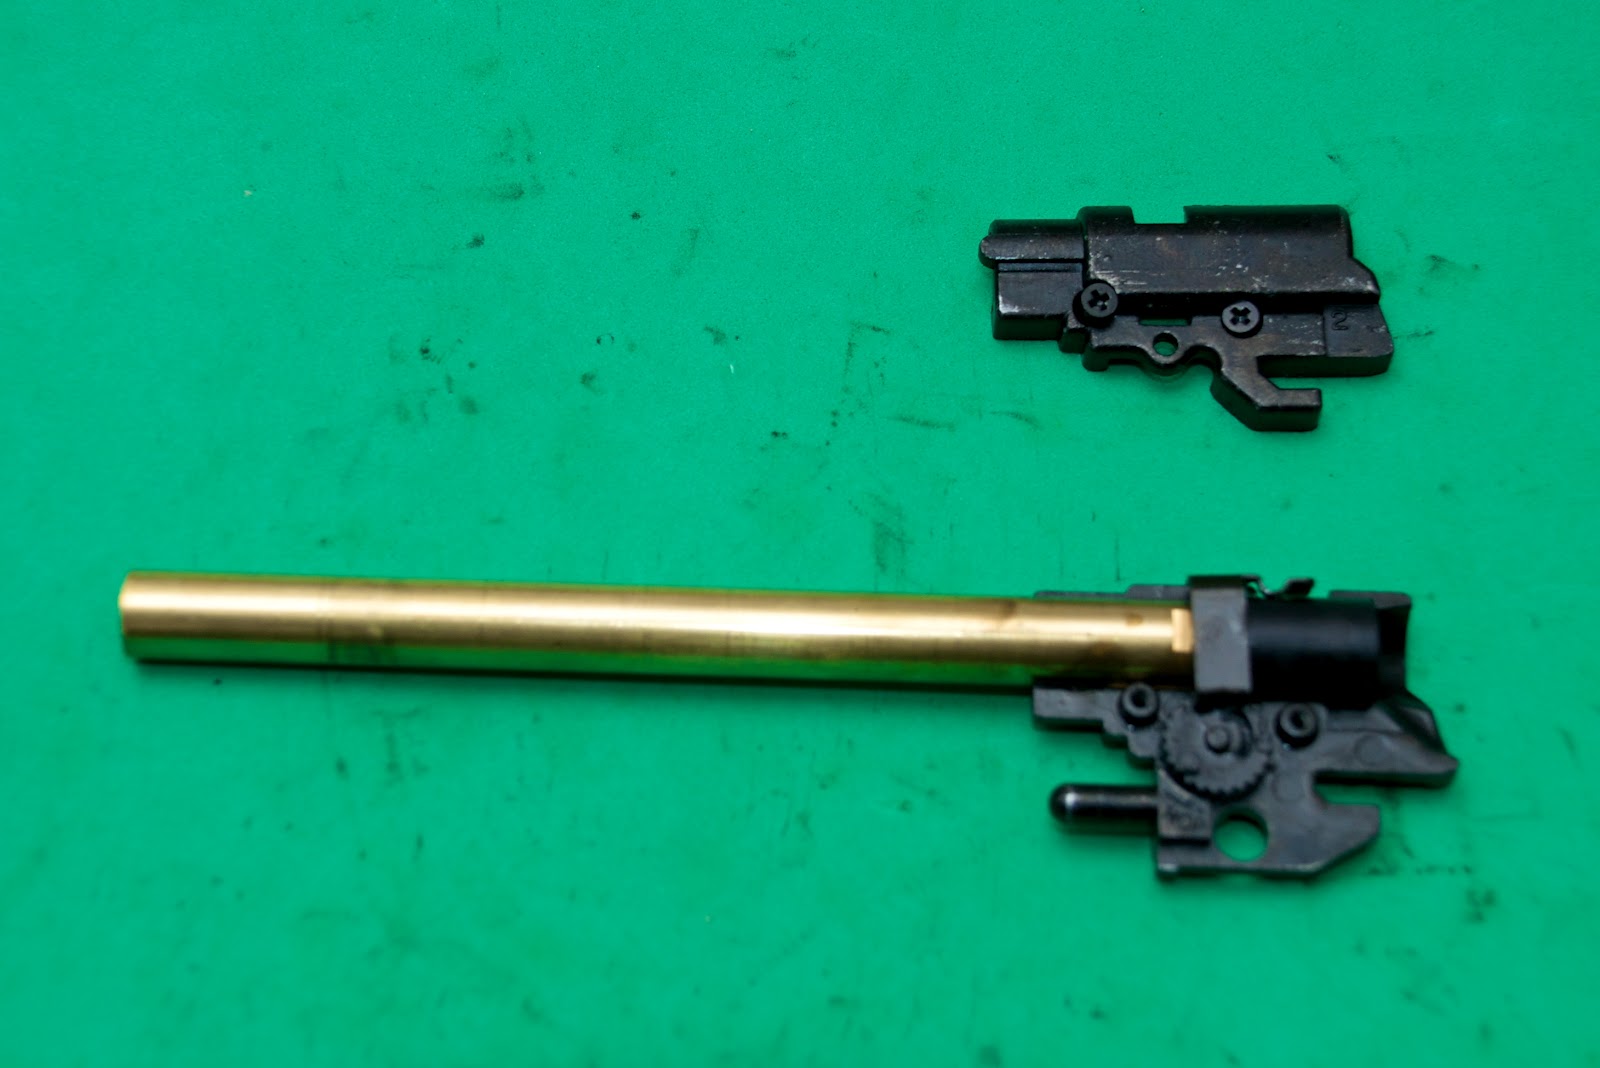
By undoing the two screws, one half of the hop chamber can be removed to access the hop mechanism and the inner barrel.


The hop bar and the inner barrel-hop rubber assembly was then detached from the hop chamber to be replaced by the Nineball inner barrel and hop rubber.


The whole inner barrel-hop chamber assembly was put back together.


The stainless steel outer barrel and chamber was assembled with the o-ring that comes with the kit.


The inner barrel-hop chamber assembly is now inserted into the outer barrel assembly.


By removing the screw at the rear of the slide, and the screw on top of the rear sight, the blowback housing can be taken out of the slide. With a bit of a force to widen the gap in the slide cavity, the blowback unit can easily come out.


The photo below shows the blowback housing and the loading nozzle already separated. The blowback housing, screw and loading nozzle spring will all be kept in storage and replaced.


This is now the replacement blowback housing. It is an Airsoft Surgeon BBH and it comes with its own screw and loading nozzle spring. Also shown in the photo is the loading nozzle spring guide that came in with the Tactical Entry conversion kit.


After positioning the rear sight in the slide, the whole blowback unit was then installed into the aluminum Hurricane slide. It is again a simple drop-in fit. The BBH was then screwed into the slide to keep it from moving.


The outer barrel assembly was then put into place.


And after placing the new full-length guide rod and barrel plug assembly along with the 1911A1 barrel bushing and the upgraded recoil spring that was included in the Hurricane kit, here now is the finished Kimber Tactical Entry slide.


Wired out.

05 March 2012

Kimber Tactical Entry II: Internal Parts

I have already discussed the internal parts that I usually would replace in customizing an airsoft 1911 so I'm just going to do some sort of recall on these parts for the Tactical Entry build.

The first major component that I would replace is the blowback housing or blowback unit. Just like the Covert, I used the Airsoft Surgeon Super Lightweight Speed Blowback Housing for the Tactical Entry because it is about 50% lighter than the original BBH of TM.


The next internal part I replaced is the hop-rubber. I used the Laylax-Nineball hop rubber because it is believed by many to provide better sealing. Based on the Covert that I built, this hop rubber works like magic as just a small turn of the hop towards the "on" position from the "zero/off" position gave me a very straight, consistent BB flight.


Now here comes the interesting part. When I built the Covert, my M.E.U. was already using a PDI 6.01 Palsonite inner barrel. After finishing the build and testing the gun out, the Palsonite barrel-Nineball hop rubber combination works wonders. In this Tactical Entry build, I planned to use the Nineball 6.03 inner barrel to see which combination works better. (I will post the results in a different entry)


Again, like the Covert, this custom build used other internal upgrade parts that are already included in the kits. The upgraded recoil spring is included in the Hurricane conversion kit and the steel sear is included in the Nova hammer set.

In my next post, I will discuss the steps in building the slide!

Just a special thanks to all my readers, followers, and supporters...even though there's not that many of you yet. Thanks!

Wired out.

02 March 2012

Kimber Tactical Entry II: Other Parts

In my pursuit of a very realistic airsoft Kimber 1911 pistol, I replaced the original parts of the Tokyo Marui Night Warrior with Nova parts that is unique to Kimber 1911s. This is basically the same as what I did to my Custom Covert II when I built it.

The first part that I really wanted to replace is the grip safety. Tokyo Marui Night Warrior's grip safety is a SFA-type with a bump while the Kimber Tactical Entry II has a smooth grip safety.


Next is the thumb safeties. The Night Warrior's thumb safeties are Kings type. Kimber has their own unique design of thumb safeties and Nova has recreated that design for airsoft 1911s.


The next part is the hammer. I used the hammer set same as the one I used for the Custom Covert: the Nova Kimber type hammer. It comes with a steel sear and pins for the strut.


Another part I replaced was the main spring housing. I removed the checkered main spring housing that I installed on my Covert and replaced it with another checkered one with a magwell. The one from the Covert was the one I used for the Tactical Entry because the Tactical Entry kit includes a magwell to be attached to a regular checkered main spring housing by removing the lanyard loop.

This was installed to the Custom Covert II


This was moved from the Custom Covert II to the Tactical Entry II


One part or set of parts that I used in the Tactical Entry build but not in the Covert build is the stainless steel full length guide rod and barrel plug set. I used a PDI full-length guide rod and plug set which looks exactly like the one on the real Tactical Entry II.


One more thing worth mentioning here is that I used my seasoned Tokyo Marui 1911A1's barrel bushing in the Tactical Entry because the one that is in the Night Warrior is silver; and the Tactical Entry has a black one same as the 1911A1.

I will be discussing the internal parts I replaced for this custom build next time. They are actually the same as the ones I used for the Covert but I'm posting them anyway, just for the sake of consistency.

Thanks!

Wired out.